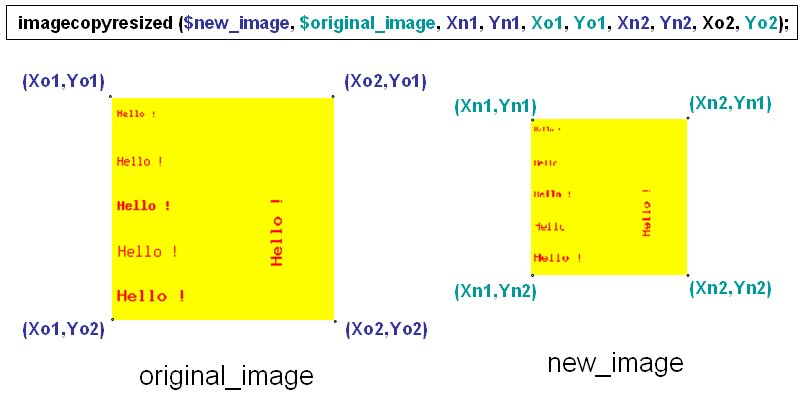
1
2
3
4
5
6
7
8
9
10
11
12
13
14
15
16
17
18
19
20
21
22
23
24
25
|
<?php
create_image();
print "<img
src=image.png?".date("U").">";
function
create_image(){
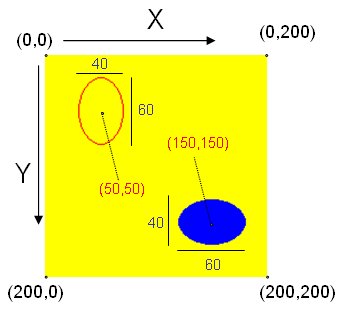
$im = @imagecreate(200,
200) or die("Cannot
Initialize new GD image stream");
$background_color = imagecolorallocate($im,
255, 255, 0); // yellow
$red = imagecolorallocate($im,
255, 0,
0);
// red
$blue = imagecolorallocate($im,
0, 0,
255);
// blue
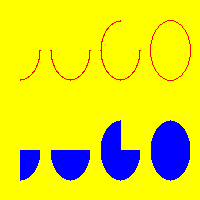
imagearc($im,
20, 50, 40, 60, 0, 90, $red);
imagearc($im,
70, 50, 40, 60, 0, 180, $red);
imagearc($im,
120, 50, 40, 60, 0, 270, $red);
imagearc($im,
170, 50, 40, 60, 0, 360, $red);
imagefilledarc($im,
20, 150, 40, 60, 0, 90, $blue, IMG_ARC_PIE);
imagefilledarc($im,
70, 150, 40, 60, 0, 180, $blue, IMG_ARC_PIE);
imagefilledarc($im,
120, 150, 40, 60, 0, 270, $blue, IMG_ARC_PIE);
imagefilledarc($im,
170, 150, 40, 60, 0, 360, $blue, IMG_ARC_PIE);
imagepng($im,"image.png");
imagedestroy($im);
}
?>
|
|